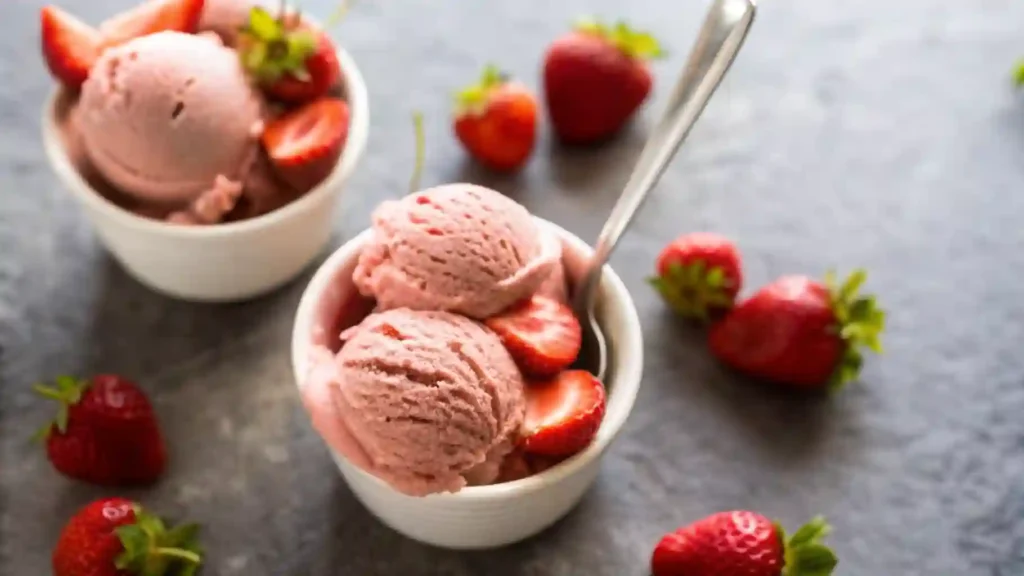
The Best Homemade Strawberry Ice Cream
There’s something magical about the first bite of truly good strawberry ice cream. It’s creamy, rich, and packed with the bright flavor of real strawberries. But if you’ve tried making it at home, you’ve probably ended up with something icy or bland.
That’s where this recipe changes everything.
This guide shows you how to make unbelievably creamy, deeply flavorful strawberry ice cream without needing an ice cream machine. It’s not just possible. It’s easy.
The secret? A simple method that removes extra water from the strawberries. This single step transforms your ice cream from icy to silky smooth.
Ready to taste the best homemade strawberry ice cream of your life? Let’s get started.
Table of Contents
Why This No-Churn Recipe Works (And Is Better Than Others)
Most strawberry ice cream recipes leave you with a texture that’s more icy than creamy. The reason is simple. Strawberries are loaded with water. When that water freezes, it forms crystals that ruin the smooth texture you want in good ice cream.
This recipe solves that problem completely.
Instead of using raw or blended strawberries, you’ll roast them. Roasting does two important things. It intensifies the natural flavor and it removes much of the water. The result is a thick, concentrated strawberry base that blends perfectly with the cream.
This single step puts this recipe ahead of others. You get bold strawberry flavor with a smooth texture that scoops like a dream.
Simple Ingredients for the Best Flavor
To make this no-churn strawberry ice cream, you only need a few ingredients. Each one plays an important role in creating that creamy, rich texture and fresh fruit flavor.
- Fresh strawberries
- Granulated sugar
- Heavy whipping cream
- Sweetened condensed milk
- Vanilla extract
- Pinch of salt
A Quick Note on Ingredients
Use full-fat heavy cream and full-fat sweetened condensed milk. The fat content is what gives your ice cream its creamy, scoopable texture. Low-fat options might seem tempting but they lead to a harder, icier result. Stick with full-fat and you’ll taste the difference.
Step-by-Step Instructions for Perfect No-Churn Ice Cream
Making strawberry ice cream at home doesn’t need to be complicated. Follow these steps closely and you’ll get a smooth, flavorful ice cream every time.
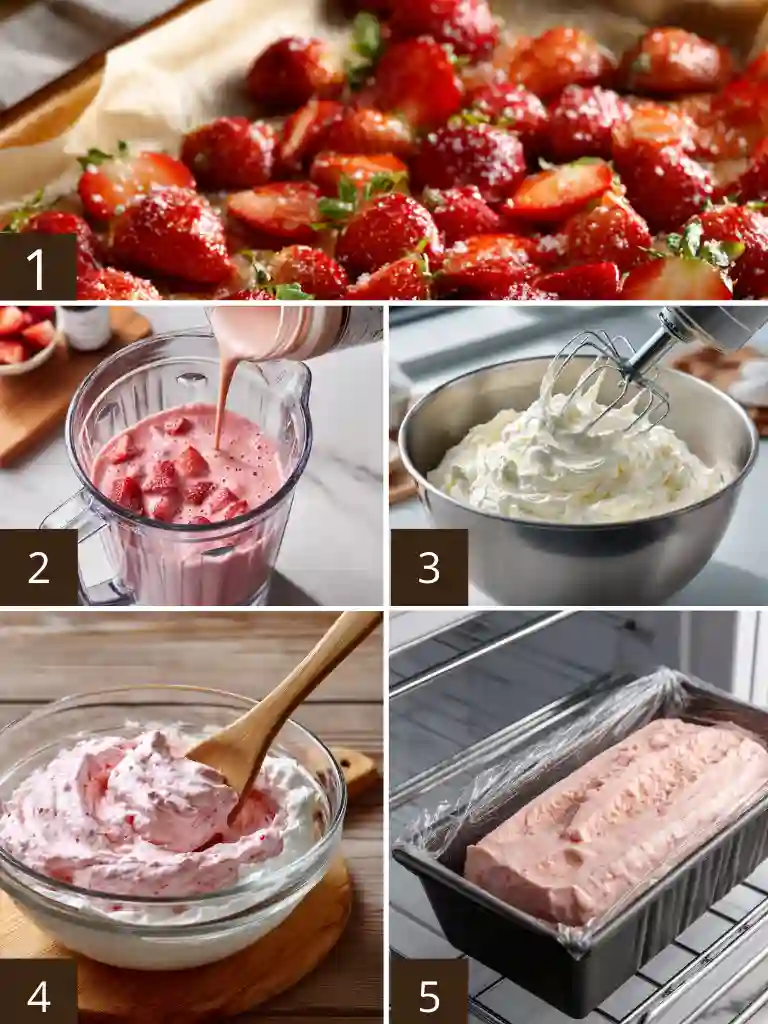
Step 1: Roast the Strawberries
Preheat your oven to 375°F. Hull and halve the strawberries, then toss them with granulated sugar. Spread them out on a parchment-lined baking sheet in a single layer. Roast for 25 to 30 minutes, stirring once halfway through. Let them cool completely. Roasting removes excess water and deepens the strawberry flavor.
Step 2: Create the Flavor Base
Once cooled, transfer the roasted strawberries to a blender or food processor. Add the sweetened condensed milk and vanilla extract. Blend until smooth. The mixture should be thick, fragrant, and vibrant in color.
Step 3: Whip the Cream
In a clean, chilled mixing bowl, pour in the heavy whipping cream. Beat with a hand mixer or stand mixer on medium-high speed until stiff peaks form. This usually takes about 3 to 4 minutes. Stop whipping as soon as the cream holds its shape. Over-whipping will turn it grainy.
Step 4: Gently Fold (Don’t Stir!)
Take a large spoonful of the whipped cream and fold it into the strawberry base to lighten the mixture. Then gently fold in the rest of the whipped cream using a rubber spatula. Work slowly and use a folding motion to keep the mixture airy. Avoid stirring which deflates the whipped cream.
Step 5: Freeze
Pour the finished mixture into a loaf pan or freezer-safe container. Smooth the top, then press a piece of plastic wrap directly onto the surface to prevent ice crystals. Freeze for at least 6 hours or until firm.
Now you’re just a scoop away from enjoying the creamiest homemade strawberry ice cream.
The Ultimate Troubleshooting & FAQ
Homemade ice cream can be tricky if you’re not sure what to expect. Here are the most common questions and clear answers to help you get the best results every time.
What’s the difference between churn and no-churn ice cream?
Churned ice cream uses a machine that freezes and churns the mixture at the same time. This creates a dense and creamy texture by adding air and keeping ice crystals small. No-churn ice cream skips the machine by whipping the cream for volume and blending it with a thick, sweet base. Both can be delicious, but no-churn is faster and easier with less equipment.
Why is my homemade ice cream icy?
The number one cause of icy texture is too much water. Strawberries naturally hold a lot of moisture. That water turns into large ice crystals when frozen. This recipe solves that by roasting the strawberries to remove the water before blending. Also, using full-fat ingredients helps prevent ice formation.
Can I use frozen strawberries for this recipe?
Yes. Thaw the strawberries completely, then drain off the excess liquid. Pat them dry with paper towels before roasting. This step keeps the final mixture from being too watery.
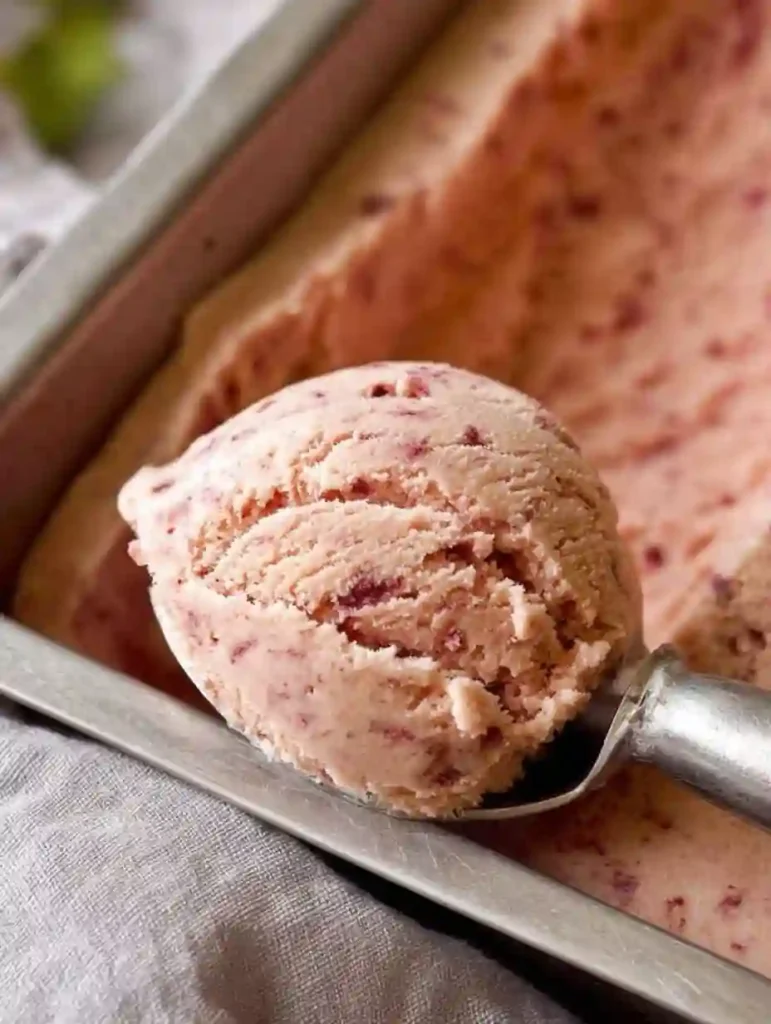
How can I add strawberry chunks?
To keep bits of fruit in your ice cream, dice a few fresh strawberries and fold them in gently after combining the whipped cream and strawberry base. Make sure the pieces are small and dry so they don’t freeze hard.
Can I make this with less sugar?
Technically yes, but it will change the texture. Sugar helps keep the ice cream soft by lowering its freezing point. Reducing the sugar will make the ice cream harder and less scoopable. For best results, use the full amount.
Recipe Variations & Pro Tips
Once you’ve mastered the base recipe, you can tweak it to fit your taste or dietary needs. These easy variations and helpful tips can take your strawberry ice cream to the next level.
Pro Tip: For a Softer Scoop
Before freezing, let the finished mixture sit in the fridge for about 20 minutes. This short rest helps the ingredients blend more evenly and improves the final texture. Also, let the ice cream sit at room temperature for 5 to 10 minutes before scooping for the smoothest result.
Vegan Version
Swap out the dairy with full-fat canned coconut cream and coconut condensed milk. Make sure to chill the coconut cream overnight and use only the thick part. The result is a rich and creamy plant-based version with a hint of coconut.
Super-Fast Shortcut: The Jam Method
In a rush? Use one and a half cups of high-quality strawberry jam instead of roasted strawberries. Whisk the jam into the condensed milk and vanilla, then fold in the whipped cream as usual. It’s quick and still tastes amazing.
Storing & Serving Suggestions
To keep your homemade strawberry ice cream tasting fresh and creamy, proper storage is key. And when it’s time to serve, a few thoughtful pairings can make it even better.
Storage Tips
Transfer the ice cream into an airtight container. Press plastic wrap directly onto the surface of the ice cream before sealing the lid. This prevents ice crystals from forming and keeps the texture smooth. Store it in the coldest part of your freezer. For best quality, enjoy within two weeks.
Serving Ideas
Scoop it into a bowl or cone for a classic treat. For something extra special, serve it with buttery shortcake, warm brownies, or slices of pound cake. A drizzle of honey or a few fresh mint leaves can also add a nice touch.

conclusion
Now you know how to make the creamiest, most flavorful strawberry ice cream at home. It’s better than store-bought and easier than you think. Try it out and see the difference. If you give this recipe a go, share your results by leaving a comment and rating below.
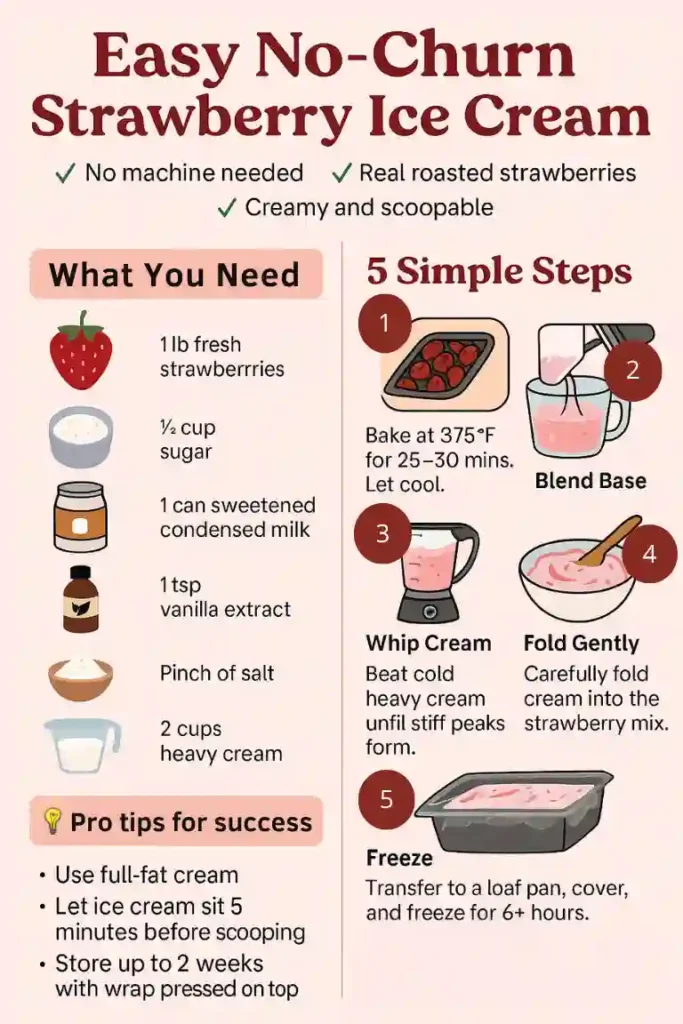
Prefer to follow a visual guide while you cook? Save or print this quick-reference infographic.
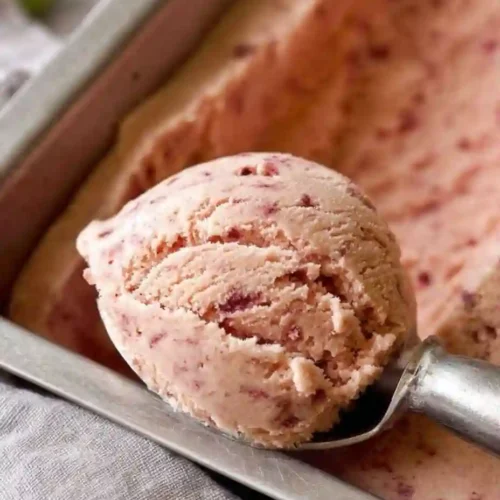
Easy No-Churn Strawberry Ice Cream
Equipment
- Oven
- Baking Sheet
- Blender or Food Processor
- Hand Mixer
- Mixing bowls
- Loaf Pan
- Plastic Wrap
Ingredients
Ice Cream Base
- 1 pound fresh strawberries hulled and halved
- 0.5 cup granulated sugar
- 1 can (14 ounces) sweetened condensed milk
- 1 teaspoon vanilla extract
- 1 pinch salt
- 2 cups heavy whipping cream cold
Instructions
- Preheat oven to 375°F. Toss strawberries with sugar and spread on a parchment-lined baking sheet. Roast for 25 to 30 minutes, stirring once. Let cool completely.
- Blend cooled strawberries with sweetened condensed milk, vanilla extract, and salt until smooth.
- In a chilled bowl, whip the heavy cream with a hand mixer until stiff peaks form. Do not over-whip.
- Gently fold the strawberry mixture into the whipped cream using a spatula. Mix until just combined without deflating.
- Pour mixture into a loaf pan. Smooth the top and press plastic wrap directly onto the surface. Freeze for at least 6 hours or overnight.
Notes
Total Fat: 23g
Saturated Fat: 15g
Cholesterol: 86mg
Sodium: 121mg
Total Carbohydrates: 34g
Dietary Fiber: 1g
Total Sugars: 31g
Protein: 4g
Vitamin C: 35mg
Calcium: 120mg
Iron: 0mg
Potassium: 227mg
For more creative cooking & baking inspiration ideas, explore the Pinterest or connect with us on Facebook.

